- Products
- Marking
- Alternative
RP2040 for a First Pass at TinyML
RP2040 for a First Pass at TinyML
RP2040 gives a team a practical place to start when a small TinyML idea has to leave the notebook and face a real board. The part is familiar, inexpensive to evaluate, and backed by enough open software that firmware can move quickly. That does not make it a universal inference device. It gives engineers a way to prove the sensor path, memory budget, timing behavior and product interface before choosing a heavier processor or a device with a neural block.
The useful question is not whether RP2040 can run a model in a demo. The useful question is whether the proposed product can collect stable data, run a small model at the required rhythm, recover from sleep, report a result and remain serviceable after the enclosure, connector path and power source are added. A first pass at TinyML should produce evidence about that complete path.
Treat RP2040 as a Validation MCU
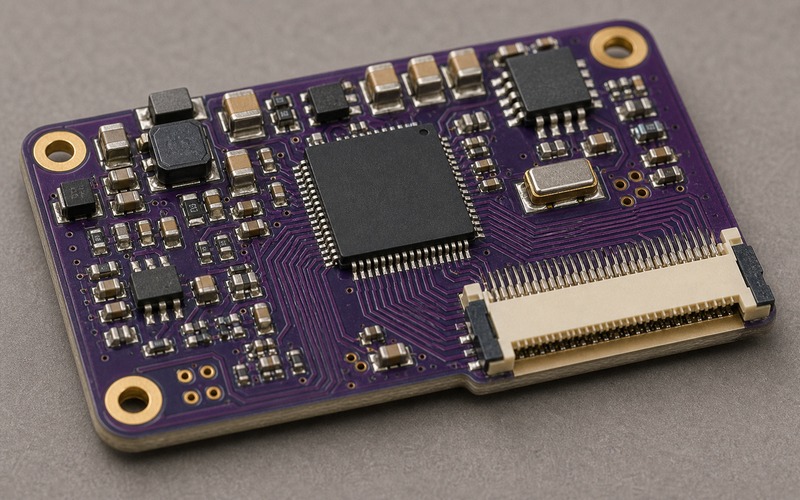
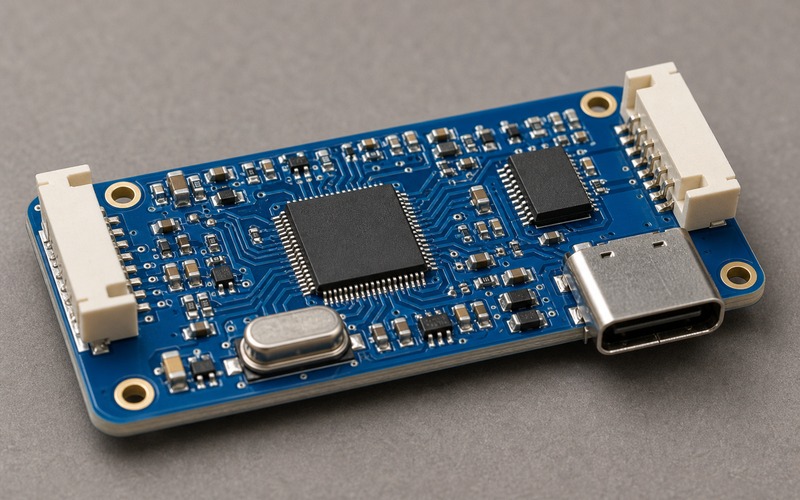
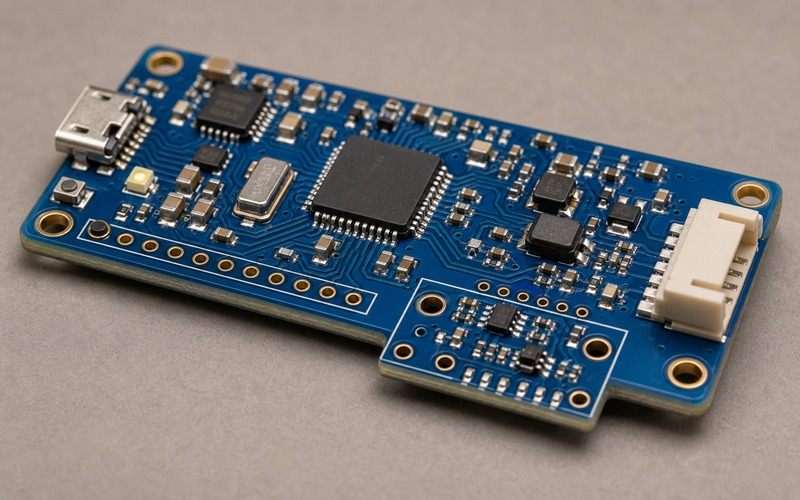
RP2040 is built around a dual core Arm Cortex-M0+ architecture with on-chip SRAM, flexible programmable I/O and a simple external flash boot path. Those traits are useful in early TinyML work because they let the board talk to sensors, shape timing and keep the firmware loop visible. The part is easy to probe, and the design team can see where the cycles and bytes go.
The limitation is part of its value. A model that fits cleanly on RP2040 has already been forced to stay small. The team has to pick an input window, quantize the network, trim features and measure the latency instead of hiding waste behind a large memory system. That pressure makes RP2040 useful for gesture detection, vibration pattern checks, simple audio features, threshold-assisted classification and other narrow tasks where the feature pipeline matters as much as the model.
For image-heavy work, transformer models or large audio pipelines, RP2040 will reach its boundary fast. That boundary should be written down rather than treated as failure. If the experiment proves that the sensor path is correct but the model needs more RAM, faster math or a different camera path, the RP2040 board has still done its job. It has separated signal and product questions from accelerator choice.
Start with the Sensor Path
A TinyML decision is only as useful as the data that reaches the model. Before comparing model size, check how the signal enters the RP2040 board. A microphone may need a clean clock, an accelerometer may need fixed sampling intervals, and a temperature or pressure sensor may need enough settling time before the reading is meaningful. The processor cannot repair a signal path that was allowed to wander.
List the sensor interface, rail voltage, sample rate, interrupt behavior and calibration method. I2C and SPI sensors need bus pullups, address planning and recovery behavior. Analog sensors need a stable reference, input filtering and an ADC path with enough span. Digital microphones and time-sensitive signals need timing review, because a model trained on even spacing can become unreliable when firmware adds jitter.
Keep the physical routing honest. A connector that brings in the sensor should face the product edge where the cable or flex will enter. Long sensor traces need a reason. High impedance nodes should stay away from switching currents. If a model seems unstable, the first fault may be the board path rather than the network.
Size Memory Before Choosing the Model
RP2040 has a modest memory budget, so the model review has to include more than the stored weights. Count the input buffer, feature buffer, tensor arena, stack, logging area, communication buffers and any sensor history needed for a stable decision. The external flash can hold firmware and data, but it does not behave like fast internal RAM during inference.
A good first test uses the smallest model that can answer the product question. For vibration monitoring, that may mean a short FFT feature set rather than raw waveform inference. For gesture work, it may mean a few axes over a bounded time window. For audio, it may mean low-rate features and a narrow label set. Each cut should be tied to the product decision, not to a benchmark score.
The firmware build should report memory use in a repeatable way. Keep the compiler version, model converter version and library version with the engineering note. A model that fits after a lucky build flag is a risk. A model that has clear headroom after sensor drivers, diagnostics and communication are added is a candidate for the next board spin.
Check Timing, Power and Sleep Recovery
Many TinyML products spend more time waiting than calculating. That makes wake timing, sensor readiness and rail recovery part of the model path. Measure how long the board takes to wake, capture a window, build features, run inference, report the result and return to its low power state. A single average current number can hide a slow recovery path or a current spike that resets a weak supply.
RP2040 can be a strong validation choice when the product stays awake during a short decision cycle. For a device that must remain alert for months on a small cell, the review needs a stricter sleep budget. The board should record active time, idle time, sensor duty cycle and regulator quiescent current. The MCU choice and the power tree cannot be separated during this check.
Thermal behavior is usually modest on an RP2040 TinyML board, yet the layout still matters. Local regulators, flash access, radio bursts and charger heat can shift sensor readings or clock behavior. Keep hot parts away from sensitive sensors when the measurement depends on temperature, drift or mechanical stability.
Use PIO and Firmware Structure Carefully
Programmable I/O is one reason RP2040 appears in early hardware experiments. It can help with sensor timing, custom serial capture, pulse measurement and simple glue logic that would otherwise require another device. That flexibility should be documented as part of the design, because a clever PIO program can become a hidden dependency during replacement or production review.
Keep the firmware structure clear. The sampling task, feature extraction, inference call, reporting task and error handler should each have a measurable role. If both cores are used, state what runs on each core and how shared buffers are protected. A race condition in the data path can look like a model accuracy problem.
Diagnostic output should support engineering review without changing the timing so much that the result becomes false. Capture counters, timing marks and failed sensor reads. Save enough information to repeat a borderline result. A board that can explain a wrong decision is more useful than a board that reports a clean label with no evidence.
Build the Test Around Repeatable Evidence
A first pass TinyML board needs a repeatable test method before the model result has meaning. Define the input cases, record how the samples were collected, and keep a small set of known good and known bad examples near the firmware project. The team should be able to re-run the same cases after a library update, a sensor change or a board revision.
The acceptance test should include ordinary cases and boundary cases. For a vibration classifier, include quiet operation, expected motion, nearby motor noise and a loose mechanical mount. For an audio feature, include different distances, enclosure states and background levels. For a gesture sensor, include slow motion, fast motion and partial movement. The goal is to expose weak assumptions while the board is still easy to change.
Keep the data path traceable from the physical signal to the label. A raw sample, a feature vector, a model score and a final decision each answer a different question. If the final label changes after a layout or firmware change, those intermediate points help locate whether the problem came from the sensor, feature extraction, memory pressure or the model itself.
Record the board revision, sensor lot, supply setting and enclosure state for each test run. Those details prevent a later team from approving a result that depended on a bench setup no product will use.
Review the Board as a Product Candidate
A first pass board should still respect product constraints. Check the package placement, flash location, clock routing, decoupling, reset path, boot access and debug access. Leave probe points for the rails and signal lines with the highest failure risk. Avoid hiding the only useful measurement point under a module, shield, battery holder or display.
Connector direction is part of the review. Sensor connectors, USB ports, flex tails and board-to-board headers should face the way the product will be assembled. If a cable would have to fold sharply across the processor, the picture is telling the wrong story. The physical route affects signal quality, mechanical life and inspection.
Substitution review also starts on the board. A replacement MCU may keep the firmware concept but change flash interface, boot behavior, GPIO drive, package size or power modes. A replacement flash device may change erase timing or operating voltage. A replacement sensor may keep the bus address but change noise, latency or calibration. RP2040 validation should make those boundaries visible.
Know When to Move Beyond RP2040
RP2040 is a good first pass when the product question is narrow, the sensor path is still being shaped, and the team needs fast firmware feedback. It becomes the wrong center of gravity when the model needs sustained matrix math, larger memory, camera throughput, secure update requirements or strict long sleep intervals beyond the board budget.
The next step may be a higher performance MCU, an MCU with a neural block, an application processor, an FPGA path or a dedicated inference device. The choice should follow measured evidence: model size, latency, active energy, sensor bandwidth, interface load, tool support and the amount of redesign needed for production.
Keep the RP2040 result useful even when the final product moves elsewhere. The board can still define the sensor connector, input filtering, sample window, feature set, acceptance test and failure cases. Those artifacts reduce guesswork when a new processor is evaluated.
Final RP2040 TinyML Selection Checklist
Before approving RP2040 for a TinyML prototype or small product, confirm the real sensor path, sample timing, power state behavior and memory headroom. Check the MCU package, flash part, clock source, regulator, decoupling and debug access against the board layout. Confirm that every connector faces the real assembly path and that the sensor routing matches the expected environment.
For purchasing and engineering review, keep the exact part number, package, flash pairing, rail requirements, firmware tool versions, measured current profile and approved alternatives in the component record. If the model or product condition pushes beyond RP2040, the same record should show which constraint changed and which processor class should be evaluated next.